Sustainable Furniture

When Can I Put Furniture on Refinished Hardwood Floors?

How long should you wait before putting furniture on your refinished floors?

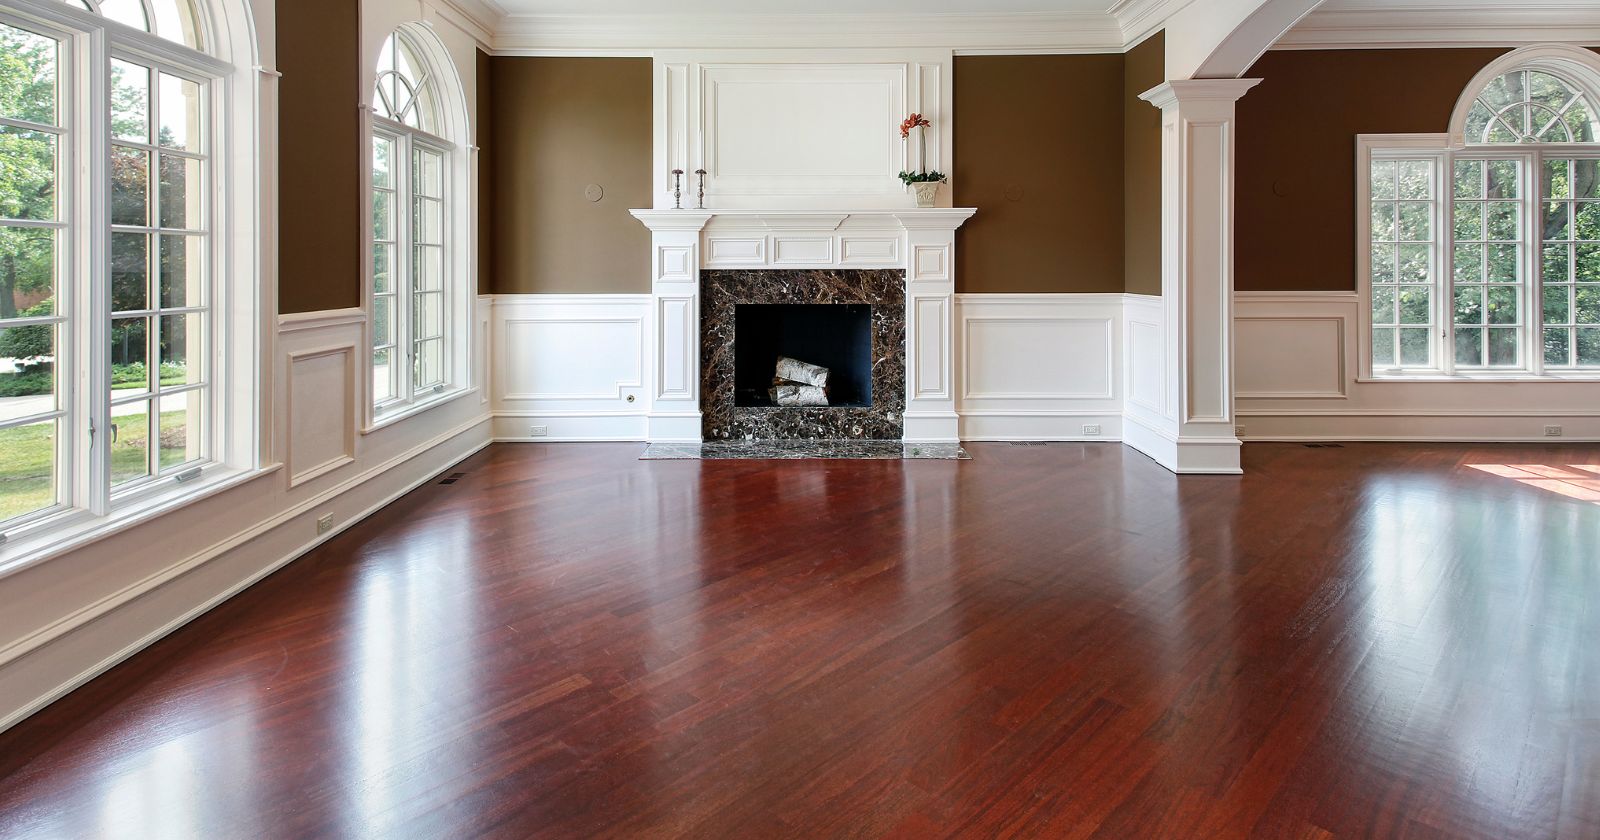
Putting Back Furniture On Refinished Floors Featured

One of the biggest mistakes you can make after refinishing your hardwood floors is to put your furniture and area rugs back in place before the new finish has been given time to penetrate, harden, and completely cure. This is something a lot of homeowners are unaware of, but it’s a problem that can completely spoil your refinishing project.

The time you wait before putting furniture back on refinished hardwood floors depends upon the type of finish you are using. You should wait at least two days for a water-based polyurethane and four days for oil polyurethane. Other finishes may have different times – always check with your flooring professional or the label if you are going the DIY route.

Below we dig little bit deeper into what you need to know about the timing of getting your furniture back into place on floors that you have just had refinished.

p.s. Need some new furniture to go with your refinished floors? Check out our sustainable furniture guide for some ideas.

When to Put Furniture Back After Water-Based Polyurethane

Water-based poly is going to set up much faster than oil-based poly, but you’re still going to want to give your floors plenty of time to harden and cure before you start to stick furniture on top of it.

After finishing your hardwood flooring with water-based polyurethane you should wait 2 to 4 hours before walking on them (ideally longer) and you should not move furniture back for at least two days, (72 hours would be better). The longer you can wait the better and stronger your finish is likely to be and the less chance of damage occurring.

It is also a good idea to keep dogs and other pets (or little kids) off of these floors for a week or so: the last thing you want to do is scratch up your brand-new finish!

When to Put Furniture Back After Oil-Based Polyurethane

Oil based poly floors are going to need a little bit more time to fully dry and cure compared to the water-based options, usually about double the length of time if you really want a good, solid finish.

After finishing your hardwood flooring with oil-based polyurethane you should wait 3 to 4 days before you can walk on the floors (and you should not move furniture back for at least four or five days, The longer you can wait the better and stronger your finish is likely to be and the less chance of damage occurring.

The more drying time you give the floors, the better. This is especially important with oil-based poly as it needs a lot more time to set up and solidify.

There are ways to speed up the hardening process (using fans and heat lamps), but we do not recommend this. There is an not insignificant chance that you could ruin the floor’s finish. It doesn’t take a lot to make a wood floor refinishing job go sideways if you try to rush the drying and curing process. If the finish is ruined, the floor will need to be completely stripped back and the process started all over again.

When to Put Furniture Back After Other Finishes

If you’ve decided to go in a different direction to refinish your floors (maybe a more natural stain and hardwax oil solution, for example) then your “delay times” are going to be a little bit different. We can’t list every different finish here, so our best advice is to check the label of the finish you are using and/or consult your local flooring professional.

You’ll need to think about things like the traffic areas on these floor surfaces (areas with a lot of regular foot traffic need more time to dry and harden compared to those that don’t see that much), the durability and resiliency of the floor sealant you’ve chosen, and a handful of other details that have a huge influence on this timeline.

As a general rule, though, you want to stay off of all hardwood floors that have been refinished in your house for at least 48 hours – and ideally twice as long if you have the opportunity to do so. Of course, keeping people and pets off of these floors is always going to be a bit of a challenge. We recommend you put up signage after the final coat has gone down to remind people.

Further Protection For Your Refinished Hardwood Floor

Your polyurethane finish should protect your floor from everyday wear and tear. However, if you’re someone who likes to be especially careful, you could also invest in floor protectors for your furniture. Floor protectors, like these felt furniture pads (amazon) and these transparent protector caps (amazon), provide further protection from scratches or scrapes that can happen as you move your furniture across the floor.

What’s Difference Between The Cure Time and Dry Time?

There’s a big difference between the cure time and the overall dry time (or hardening time) of floor finishes, it is important that you understand this difference completely before you even think about dragging things onto your new floors.

The cure time for hardwood is the length of time it takes for every single solvent to evaporate from the finish completely, stabilizing the finish in place permanently. The dry time is the length of time it takes for surface solvents and liquids to evaporate (but no the deeper layers). The dry time is typically significantly shorter than the cure time.

The cure time for refinished hardwood floors when you’re using water-based finishes, for example, is anywhere between seven days and 14 days – and sometimes even longer than that (depending on things like temperature and humidity).

Oil poly can take 30 days or longer to fully cure, which is considerably longer than the time it takes to dry and harden to the point where you can bring your stuff out on to the wood floors themselves.

On the flip side of things, it might only take a water poly four to eight hours to be considered “dry”, and oil poly to “dry” in 12 to 24 hours.

How Long Does Sanding a Hardwood Floor Take?

You can expect the process to take at least one or two days per room with a hardwood floor. It may take longer if you have larger than average rooms, or if your wood floors are very hard.

How Long Does It Take to Refinish Hardwood Floors?

From start to finish, you should expect it to take between three to five days to refinish hardwood floors in a room. This does not include drying time, which could add up to five days to the project.

When Can You Put Rugs on Refinished Hardwood Floors?

Rugs and area rugs can only be put on refinished hardwood floors once the finishing agents have completely dried (otherwise the rugs will absorb solves that belong in the floor). Expect to wait 3-5 days oil-based finishes, a little less for water-based.

How Soon After Refinishing Can I Walk On My Hardwood Floor?

You should wait at least 2-4 hours before walking on a floor refinished with a water-based poly finish, and as much as 3 to 4 days before walking on a floor refinished with an oil-based poly finish.

Sustainable Furniture

6 Couch Cushion Support Tips To Fix Sagging Couch Cushions

Learn how to support a sagging couch instead of replacing it.

Fix Sagging Couch Cushions Featured

If you’re anything like us, your coach is one of the most used pieces of furniture in your home. It’s no surprise then that coach cushions are prone to sagging. As they start sagging, that strong support you’re used to get weaker -and more and more uncomfortable.

Many owners choose to replace their couch when they experience sagging, but this is rarely necessary (and quite wasteful). Often it is enough to fix the sagging, and as you’ll see, there are plenty of ways to do this.

Why Do Couch Cushions Sag?

When you feel your couch cushions sag, it’s a result of damage done in one or more of three areas – the frame, the springs, or the cushions themselves. If the couch frame itself is broken, you’ll probably know about it – and you’ll need to fix this first before trying any of the other solutions below.

If the springs or the cushions are getting saggy, you can improve them by adding extra support or replacing or reinforcing the foam inserts, and we discuss a number of different ways and materials you can use to do this below, including both DIY and store-bought options.

6 Ways to Fix Sagging Cushions & Sagging Couches

1: Sagging Couch Cushions? Replace Your Foam Inserts

If it’s the cushions themselves that are saggy, your best option is to replace the foam inserts with new, stronger ones. Sagging foam inserts can’t be repaired – although you could add something else in alongside them (see below) – so a replacement is normally the easiest option, and it’s not too expensive.

First you’ll need to get your hands on some replacement inserts. These are available in many different sizes, so you’ll need to remove your cushion covers and measure up what size you need before ordering. There are plenty of options on the market, including these ones by Foamrush, but unfortunately most of the easy to find options are made from polyurethane foam (made using fossil fuels). Ordering an eco-friendly alternative like latex cushions will be a bit more expensive but is possible with companies such as FoamOrder – they also do custom sizes, so you’re able to get something that fits perfectly.

A word of warning: careful when you open your new inserts. They tend to be vacuum packed and have the habit of springing out at you!

2: Bolster Couch Cushions with Additional Filling

If your cushions are still in quite good shape and just need a bit of a lift, you can add additional filling to them rather than replacing the entire contents. You’ll need thinner sheets of upholstery filling (see links in the previous section) and we recommend you start by adding 1″ and then try it out, then add another inch if needed.

For the seat cushions, you’ll need to remove the cushion cover and then cut the filling sheet to the size of your cushion (may not be needed if you have a standard size). Then use a spray adhesive to stick the old filling to the extra new bit (follow all instructions on the can) before replacing your cushion covers. Test it out for firmness then add another inch if needed to prevent sagging.

For the seat back cushions you’ll want to add a loose filling. The normal material to use for this would be Poly-fil stuffing, made from polyester foam, but we prefer organic cotton fiber, or, if you’re not vegan, lambswool. Just stuff it into the couch cushions until it’s a good shape. If you get it wrong, you can easily remove or adjust the filling.

3: DIY Plywood or Particle Board Couch Cushion Supports

Another option is to add additional support underneath your couch cushions. While there are products that achieve this (see below), you can also choose to create your own solution if you have a few tools available.

You will need:

  • 1/2″ particle board or plywood
  • Measuring Tape
  • A saw (optional – you could get your wood cut to size in-store)

To create your support, you simply need to remove your existing cushions and measure the size of plywood you need. Make sure the wood won’t stick out under the cushions, as this will be comfortable when sitting on the furniture. Buy and cut down the wood you need (or get it cut instore) then place it on the couch – that’s it!

4: Shop-Bought Couch Cushion Supports

Don’t fancy making your own? There are plenty of couch supports available online. They’re all much the same, featuring pieces of heavy-duty wood board covered in vinyl arranged so that they can fold (easily to ship). Of the options, the LAMINET Cushion Support Insert is likely your best bet, as it’s thicker (and so offers more support) than most of the other options.

5: DIY Couch Frame Repair Using Glue

If your couch frame has broken, you’ll need to repair it (or pay a professional to do it for you). Depending on the scope of the break and your DIY skills, this might easy or quite difficult. Assuming the break is relatively clean, and the wood support does not need to be completely replace, you should be able to stick the two pieces together using a strong glue (something like Gorilla Glue) and then, preferably, sistering another board onto the broken one, using both glue and screws to affix it.

6: Replace Your Couch Springs

If your couch springs have broken they won’t provide your cushions with enough support. This can be mitigated by adding additional supports in, but in some cases you’ll need to replace the springs. If you are confident in your DIY skills, there are repair kits available on Amazon. If you’re not going to repair the springs yourself, you’ll need a professional to do it.

Can You Prevent Sagging in Couches?

Most couches will eventually start to sag as a result of natural wear and tear, but bad habits can vastly increase the speed at which the couch cushions and other elements start to deteriorate. To prevent sagging, and increase the life of your couch, we recommend you avoid the following bad habits:

  • Sitting in the same spot every time – This bad habit will cause high levels of wear to your favorite spot while leaving other areas untouched. Spread the load by changing where you sit.
  • Jumping on the sofa – Children (or adults!) jumping on the sofa can damage the frame, springs and couch cushions and cause your sofa to start sagging.
  • Sleeping on the sofa – It’s not great for you and, while the occasional sleep won’t hurt, it done repeatedly will cause wear and tear. Stick to the bed if you want to prevent sagging couch cushions.
  • Never rotate the cushions – Flipping your cushions helps to ensure they wear evenly and prevent sagging. When you never flip the cushions, you get more wear in one spot.

How often should you flip couch cushions?

Turn your couch cushions every week if you are using your couch heavily and every week if you are using your couch occasionally. If your couch is a cheaper model you should turn the cushions every week regardless of use frequency.

How can I make my sofa cushions firmer?

You can make your sofa cushions firmer by adding extra layers of foam or by replacing the foam entirely. Remove the cushion cover, supplement or replace the foam, then put the covers back on the cushions again.

Can you put plywood under sofa cushions?

You can use plywood under sofa cushions to counter act sagging cushions. Cut a 1/2″ piece of plywood to fit your couch and place it under the coach cushions.

What is the best foam density for couch cushions?

Couch cushion foam density is measured in lbs per cutic ft, with higher numbers indicating higher density (firmer) cushions. Most foam cushions range from 1.5lb density to 3lb density. You’ll want a density of at least 2.0lbs for the seat cushions, but a lower density might suit the back cushions.

How long should a good couch last?

A good couch should last at least 10 to 15 years without the frame breaking. However, most couch cushions will start sagging earlier than this, and their foam insert may need replacing several times over the lifetime of the couch.

Sustainable Furniture

How to Kill Lice on Furniture and Furnishings (6 Easy Steps)

Learn how to kill lice on your furniture and furnishings.

How To Kill Lice On Furniture And Furnishings Featured

Getting rid of head lice from your hair is hard enough – but what happens when they end up on your furniture as well? Using lice treatment on hair is not enough – you need to treat your house.

To kill lice on furniture you will need to wash your furnishings and covers at home, send them to be dry cleaned, or use a specialist lice spray. If you cannot disinfect your furniture, you can isolate the infected pieces for a week to ensure the lice and nits are dead.

Lice and nits can get anywhere you put your head – on clothes, bed linens, your couch, pillow cases, blankets, throws, mattresses, sofa cushions, hair accessories, and almost any other place you can think of. Getting rid of a lice infestation requires you to treat these items as well as you or your child’s hair.

How Long Can Head Lice Live on Furniture or Furnishings?

Head lice can survive on furniture and furnishings for up to two days after which they cannot survive. The lice eggs (nits), can survive up to a week.

Without taking action, the lice can easily get back on you or your child’s head after treatment. Thankfully, after two days the lice survive without the food (your blood!) and warmth a human head provides. Similarly, the nits can only survive up to a week and won’t hatch without the warmth of a head. This means you can wait them out by isolating furniture and furnishings you think might be infected – but do you really want to stay off your furniture for a week?

Alternatively, follow the steps below:

6 Steps to Kill Lice on Furniture

Ready to get rid of lice and nits from your home? Let’s get started:

Step 1: Remove Infested Items From Use

Immediately remove and stop using any bed linen, clothing, or furnishings that may have come into contact with a person’s head. This might include pillows, duvets, quilts, throws, blankets, and cushions, as well as scarves, hats, coats, covers for car seats, towels, and even stuffed toys.

Step 2: Wash and/or Dry Infested Items

According to the CDC, exposure to hot water with a temperature above 53.5°C (128.3°F) for 5 minutes or more. The high heat will get rid of the lice and their eggs. 

Of course, for furniture, this is only good for covers and throws that can be removed, for the rest of the furniture you’ll need to go to the next step:

Step 3: Vacuum Thoroughly

Unless all your coverings can be removed, you won’t be able to easily wash or dry your furniture at high temperatures. For these items, start by vacuuming them. Done properly, this should remove most head lice and nits (eggs), but you must pay special attention to cracks and crevasses where they can easily hide.

Step 4: Use a Lint Roller

After vacuuming, use a lint roller thoroughly on the furniture. This should pick up any remaining head lice and stop the spread. Make sure you dispose of the roller carefully afterwards to prevent recontamination. Together, vacuuming and a good go with a lint roller should be enough in most situations.

Step 5: Spray Your Furniture to Remove Lice

Commercial head lice sprays are easily and cheaply obtainable at Amazon. However, lice are increasingly becoming resistant to these types of products and so-called “super lice” may survive treatment. For this reason, we recommend you use a spray as part of your campaign to get rid of lice, but not as your only strategy.

The best product we’ve found for this is the Nix Lice & Bed Bug Killing Spray for Home, Bedding & Furniture. It’s odorless, shouldn’t stain water-safe fabrics (check your label), and should eliminate both lice and nits.

Warning: Always check and follow a product’s safety instructions. Always test on a small area of furniture first to check it does not affect color.

Step 6: Isolate

If the above steps are not possible, isolate the infested items. Ideally, cover it with a plastic bag so that lice cannot possibly get off it, then leave for a week. If possible, seal the plastic bag (they can crawl). This should get rid of lice.

How long can lice live on a couch?

Head lice can survive on a couch for up to two days. Their eggs (nits), can survive up to a week.

How long do lice live on a mattress?

Head lice can survive on a mattress for up to two days. Their eggs (nits), can survive up to a week.

How long can live live on carpet?

Head lice can survive on carpets for up to two days. Their eggs (nits), can survive up to a week.

How do you treat a mattress for lice?

Vacuum the mattress thoroughly to remove most of the head lice and eggs, paying particular attention to the cracks. Then use a lint roller. Spray or isolate if you are concerned this isn’t enough.

How do you kill lice on bedding?

Kill head lice on bedding by washing using hot water and/or using a dryer. The temperature must be above 53.5°C (128.3°F) for 5 minutes or more – this high heat will kill all lice and eggs.

Does washing clothes kill lice?

Only if the temperature remains above 53.5°C (128.3°F) for 5 minutes or more. Water alone is not guaranteed to kill head lice.

Does Lysol kill head lice?

Lysol does not kill lice. We recommend you use the steps and products outlined above instead.

Does bleach kill head lice?

Yes, strong bleach will kill lice. However, the strength necessary to kill lice is not suitable for use on your or a child’s head (may cause chemical burns) and is likely to damage your furniture or furnishings. Hair bleach, which is weaker, is unlikely to kill lice, and should not be used as a lice treatment.